Sunday, September 27, 2015

Restoring an old vintage desk

Before                             After!


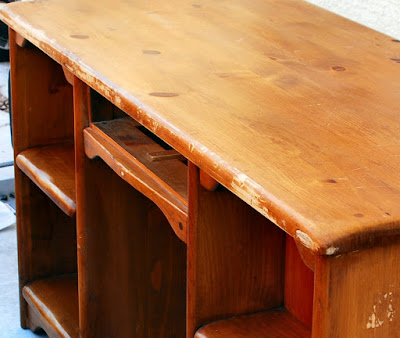
This old vintage desk had accumulated a lot of scratches, scuffs and damaged areas from wear over the years. It's a great heavy wooden desk with lots of character which made it enjoyable to restore. It is unique as there are shelves and a drawer on one side and seven drawers on the opposite side.


The sides had some rubbed areas and dents.


The drawers had worn rubbed areas and scratches from use over the years. 


I used Minwax's Antique Furniture Refinisher, a finish remover, to take off the old yellowed topcoat. ... After removing the topcoat, I cleaned the surface of the wood with mineral spirits.
 (Tung oil is used after the staining is complete.)


 When sanding wooden furniture, I always sand by hand instead of using an electric sander; it takes longer, but the results are worth it.


After hand-sanding the desk top with both 120 and 220 grit sandpaper, I used mineral spirits again to clean, and then applied the stain. ... Between layers of stain, I used 400 grit sandpaper to lightly sand to a very smooth surface.


Next, I used tung oil over the stain, rubbing the wood with 400 grit sandpaper between the layers.


Now the old vintage desk has retained its original character and looks clean, shiny and refreshed. ... For a finished look and to protect his desktop, the homeowner had me order a tinted tempered glass sheet.


Using tempered glass is a good choice for the top of a desk because it is a type of safety glass processed by controlled thermal or chemical treatments to increase its strength compared with normal glass. Tempering puts the outer surfaces into compression and the inner surfaces into tension. ... 
The glass piece had to be cut slightly smaller than the size of the surface area because of the curved edges.


Tuesday, September 22, 2015

Raising a sunken concrete slab

Before ...                   After!

A section of a homeowner's concrete walkway leading to his front door from the driveway sunk in the ground over time, causing many people to trip. I decided using a jack to lift the slab would be the best option.


I had to dig deep enough to be able to use the jack, plus I wanted to have a solid deep concrete base to keep it from sinking or moving out of place again.


I used concrete blocks (along with the jack) to hold the slab in place and shoved 390 pounds of concrete (six and a half bags) up underneath the slab.


This slab is not going to move or sink again.


The corner edge of the slab was slightly lower than the driveway, so I used gray Sakrete Top-n Bond to adjust the height. This product works great. It can make an extremely thin layer and is very durable. I applied it with a trowel and kept the area moist while it cured.


The right corner area is still curing, looking slightly darker than the rest of the slab (above) ... Below, the corner section has dried showing the color of the gray Top'n Bond blended in with the rest of the concrete.


The slab fits very well and is secure. This section and many other areas around the homeowner's yard needed more decorative rock. I had rock brought in from a local landscaping company and filled in all of the low areas in the yard. Now this homeowner's property looks beautiful!


Sunday, September 20, 2015

Repairing an irrigation hose leak under a sidewalk

A homeowner discovered one of his main irrigation hoses was leaking out in front of his house. I was asked to fix the problem.


The leak was underneath the concrete, so I decided the best solution would be to replace the entire section of hose that ran under the sidewalk.


The amount of water leaking in just several seconds was substantial. 


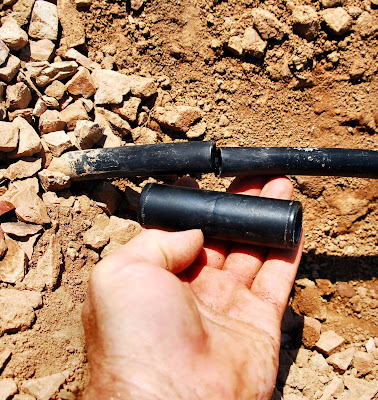
Photo shows new section of hose lying on top of the sidewalk with the ends taped to prevent dirt and rocks from getting inside.


I taped the new section of hose to the old existing hose and pulled them through until the new section was in place. I then attached the hoses with compression couplers.


The compression end cap was also leaking so I tightened it down. Now the hose doesn't leak and the plant receives the water it needs.


Saturday, September 19, 2015

Replacing a sidewalk channel drain

A homeowner needed a channel drain replaced in front of his house because it had deteriorated from the effects of the hot sun. It was brittle, cracked, and discolored. I removed the old drain from the sidewalk and cleaned the area.


The removal of the old drain piece had left the sides of the crevice very rough with some jagged protruding sections sticking out along the top edges. There were also small chunks of concrete missing on the corners.


I bought the channel drain and cut it to size, smoothed out the edges of the sidewalk, and dropped it into place to see how it would look.


The new channel drain section fit the area well but the edges of the sidewalk still didn't look very neat or straight so I built up the walls and corners of the crevice using a quick-curing mortar, smoothing out all the rough areas, making it look as clean and new as possible.


It's important to keep the work area wet until the masonry mortar cures so the possibility of the sidewalk edges dusting, chipping, or cracking in the future is significantly reduced. The high temperature that day was 105 degrees.


The replaced channel drain made his sidewalk look like new!


Monday, September 14, 2015

Repairing a water irrigation hose leak


A hose in a homeowner's water sprinkler system sprung a leak in their backyard. Not wanting to waste precious water in the arid desert climate, ... actually in time of drought ..., I was summoned to fix the problem.


Digging out the area to fix the damaged water hose ...

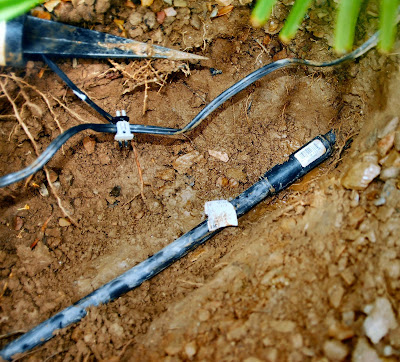
Shows the split area in the water hose.


I made a cut near the split and put on a new compression coupler.


The hose is now repaired!

Cleaning up the area ... No more leaks!